Setup wizard
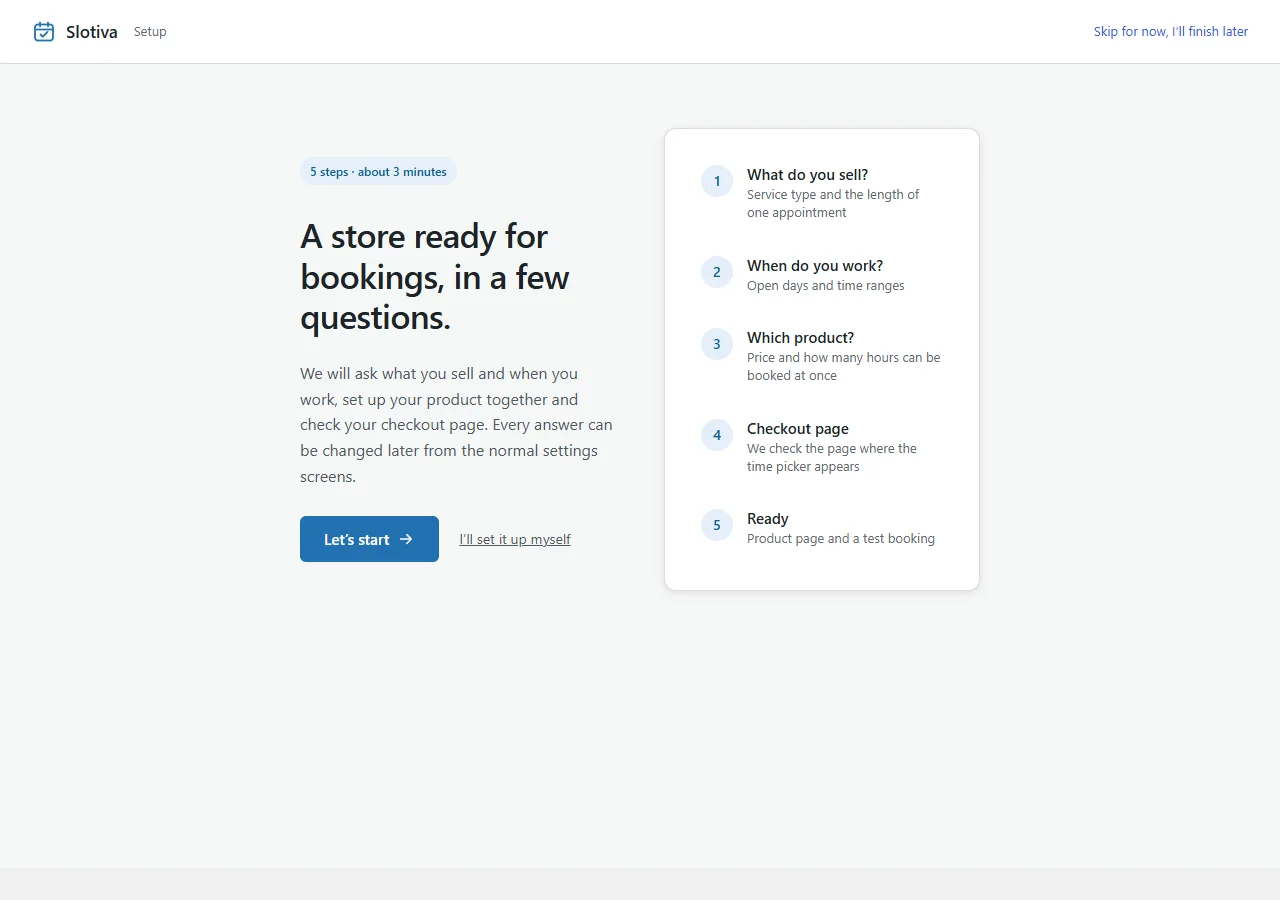
The wizard opens right after you activate Slotiva. It takes about three minutes and every answer can be changed later. You can leave at any time with Finish later; your progress is saved step by step.
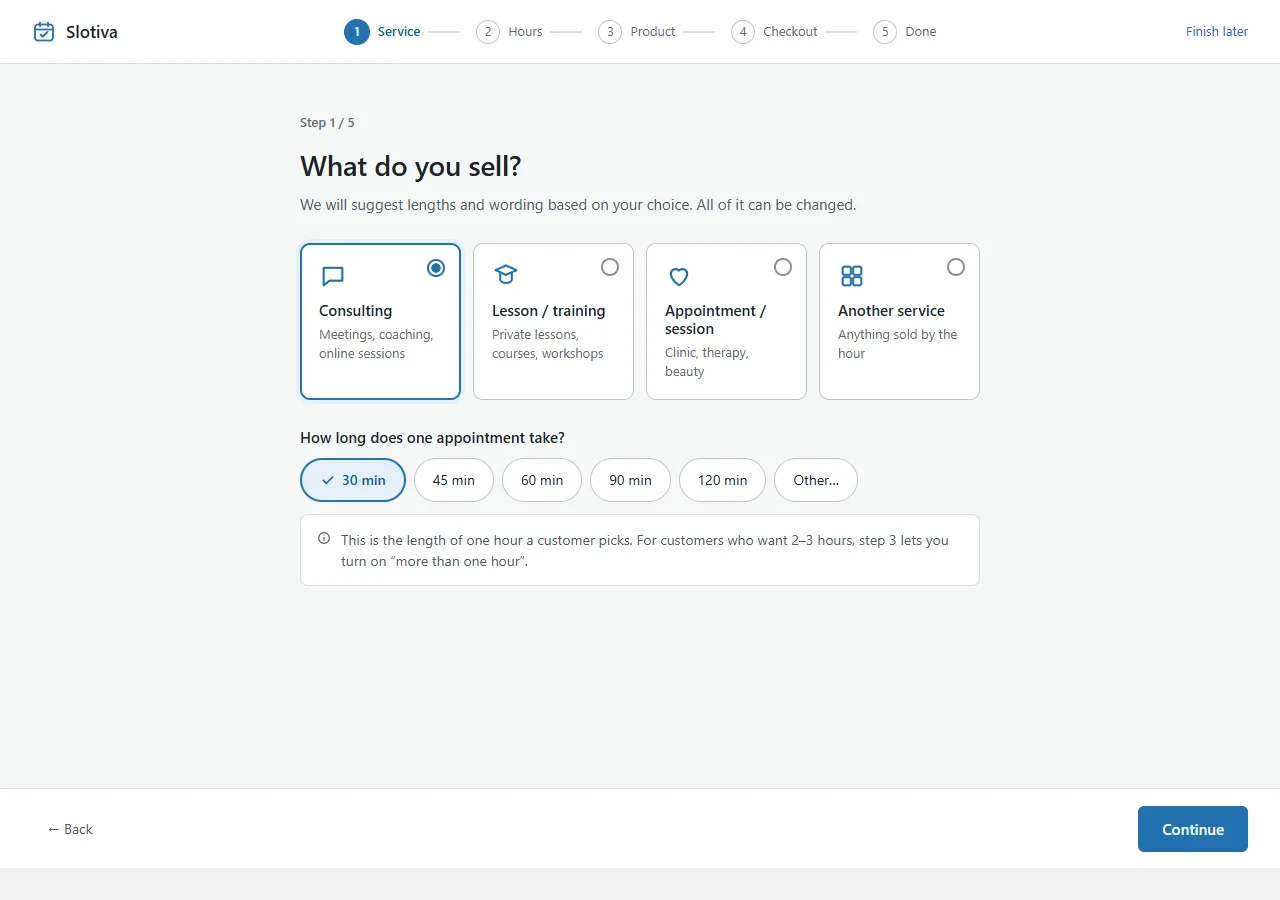
Step 1 — Service
Choose what you sell: Consulting, Lesson / training, Appointment / session or Another service. Slotiva uses your choice to suggest lengths and wording. Then choose how long one appointment lasts: 30, 45, 60, 90 or 120 minutes, or Other… for any multiple of 15 minutes from 15 to 480 (8 hours).
The length you pick here is one "hour" your customer books. Customers who want longer sessions can book several in a row — you allow that in step 3.
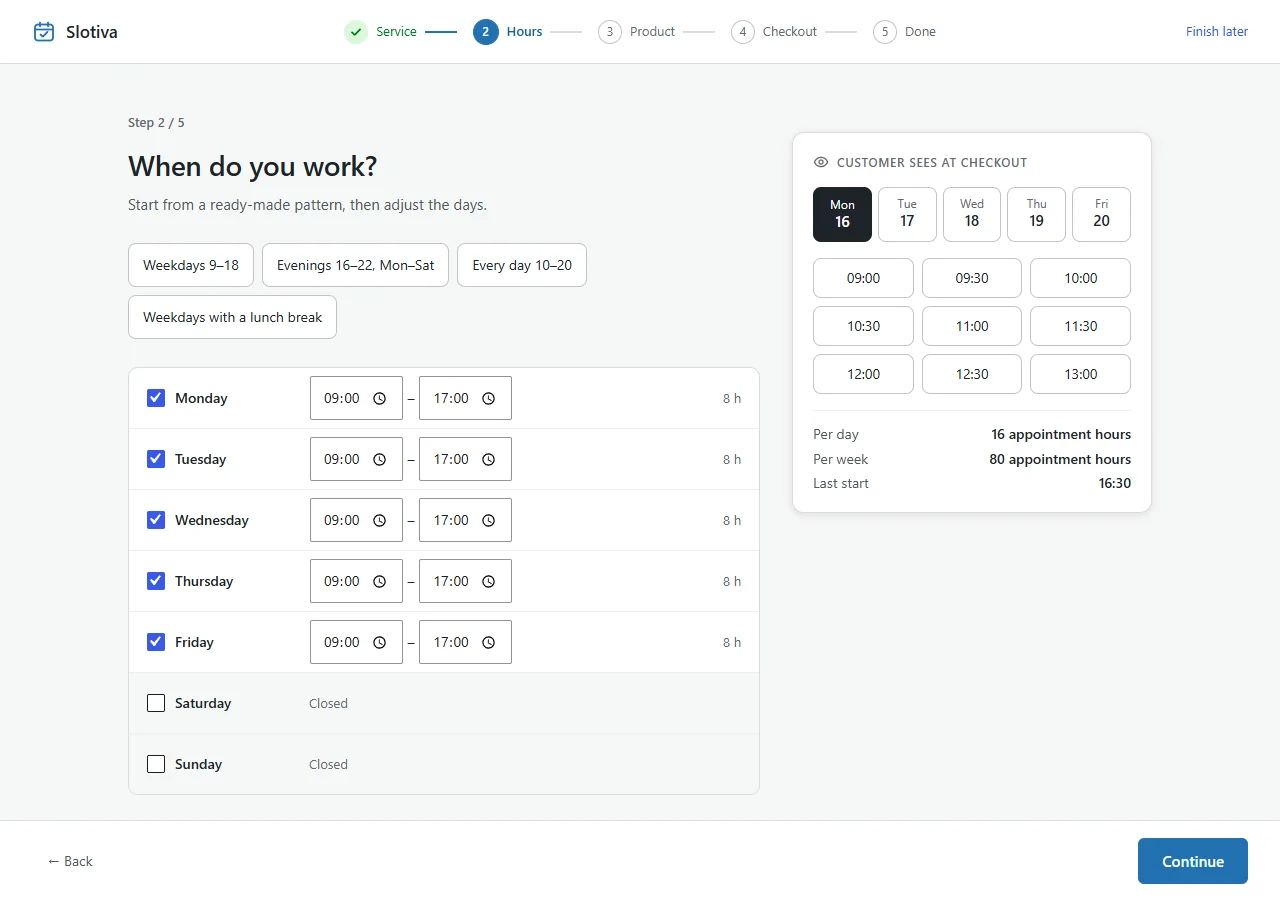
Step 2 — Working hours
Start from a ready-made pattern — Weekdays 9–18, Evenings 16–22, Mon–Sat, Every day 10–20 or Weekdays with a lunch break — then adjust the days. The panel on the right shows what your customers will see at checkout and how many appointments fit in a day and a week.
At least one day must be open to continue: a store with no open hours has nothing to sell.
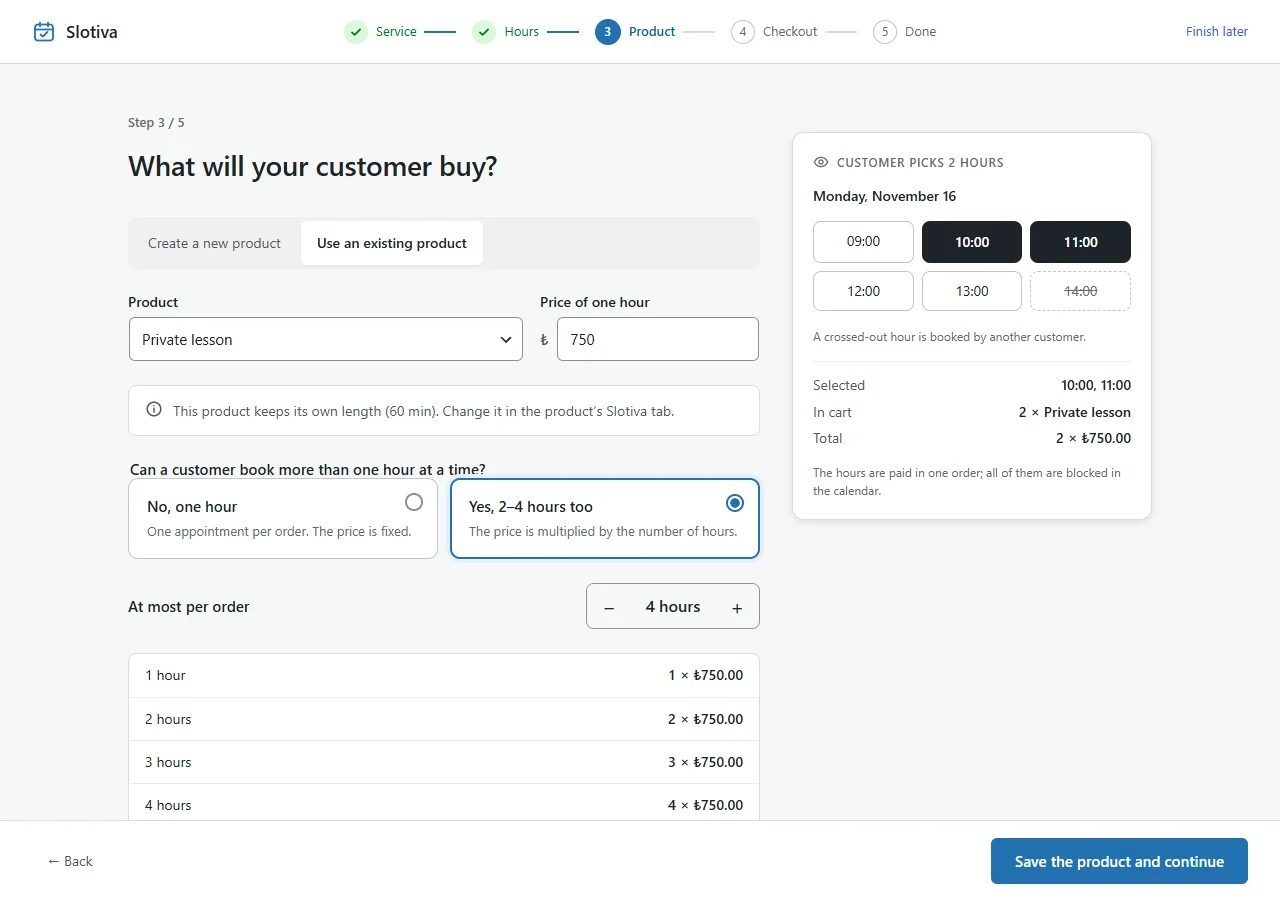
Step 3 — Product
Decide what the customer buys:
- Create a new product — enter a name and the price of one hour. Slotiva creates a published, virtual WooCommerce product.
- Use an existing product — pick one of your products and set its price of one hour. If the product is a draft or private, the wizard tells you it will be published.
The price must be a valid number; 0 is allowed (for example a free first consultation). Otherwise the wizard says Enter a valid price.
If the product you pick is already bookable, it keeps its own length, minimum hours (never more than the maximum you choose) and pricing — running the wizard again does not reset them (only answering Yes below switches a fixed-price product to a price per hour). When its length differs from the one in step 1, the step says This product keeps its own length (… min). Change it in the product’s Slotiva tab., and the customer preview and the summary in step 5 use the product's length.
Then answer Can a customer book more than one hour at a time?
- No, one hour — one appointment per order, fixed price.
- Yes — the price is multiplied by the number of hours. Set At most per order (2 to 10); the table below shows the price for each number of hours.
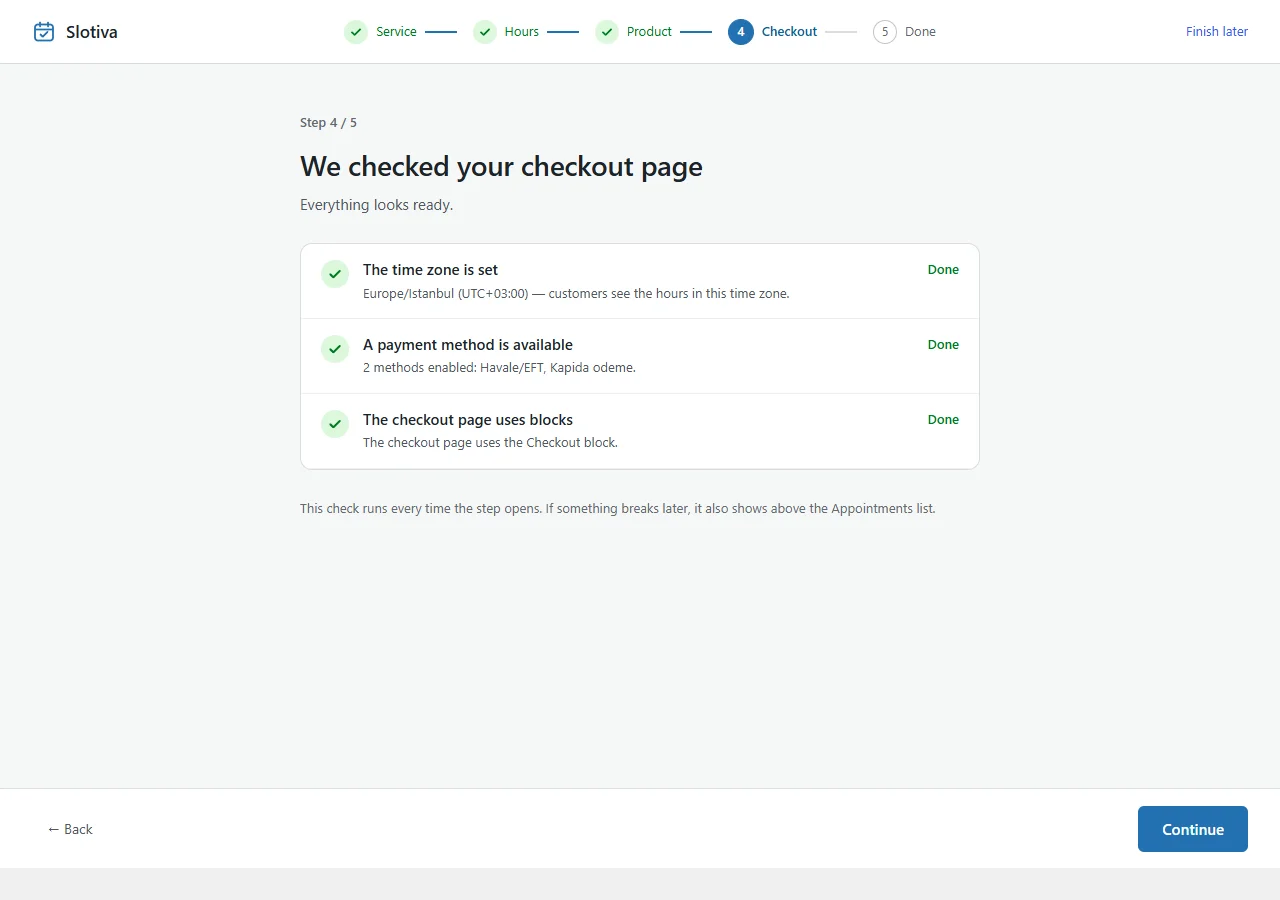
Step 4 — Checkout check
Slotiva checks three things every time this step opens:
- Time zone — a city time zone (for example Europe/Istanbul) is fine. A fixed UTC offset (such as +03:00) is marked Check, because it does not follow daylight saving changes. Change it in Settings → General.
- Payment method — at least one payment method should be enabled in WooCommerce. If none is, the row says Turn one on in WooCommerce → Settings → Payments.
- Checkout block — the checkout page must use the Checkout block. If it does not, the button Convert the checkout page to blocks opens the page editor: select the Classic Checkout block and choose Transform into blocks.
Every row that needs attention has a How to fix link to the matching answer in the FAQ (opens in a new tab). Items marked Check do not stop you; you can continue or choose I'll do this later.
Step 5 — Done
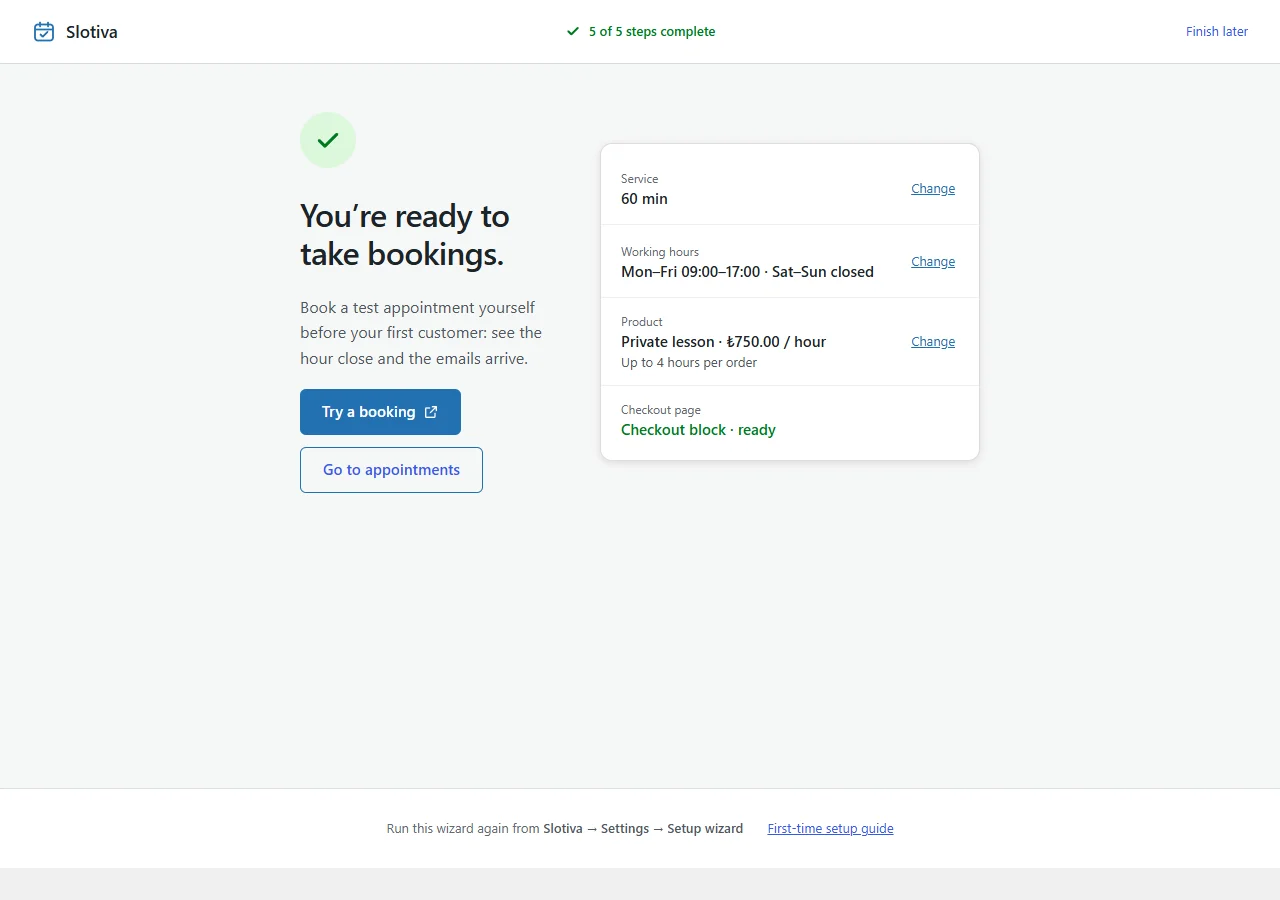
A summary of your service, working hours, product and checkout page. Change takes you back to that step (the checkout row has it only when something needs attention). Before your first customer, use Try a booking (opens your product page in a new tab) to book a test appointment yourself: see the time close and the emails arrive.
At the bottom, First-time setup guide opens this page in a new tab.
The setup checklist
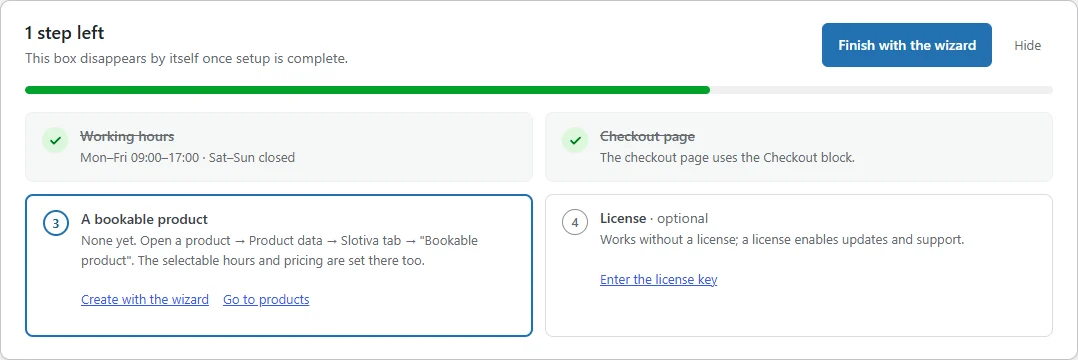
Until the three required items — working hours, checkout page and a bookable product — are done, Slotiva → Appointments shows a checklist above the list. It disappears by itself once setup is complete, or you can hide it.
Running the wizard again
Go to Slotiva → Settings and click Open the setup wizard. It starts with your current settings and your existing bookable product selected. An existing bookable product keeps its own length, minimum hours and pricing (see step 3).